# Linux
# Oh my zsh
##### Installation avec curl
```
sh -c "$(curl -fsSL https://raw.githubusercontent.com/robbyrussell/oh-my-zsh/master/tools/install.sh)"
```
---
##### Activation des Plugins (zsh-autosuggestions et zsh-syntax-highlighting)
- Download zsh-autosuggestions by
`git clone https://github.com/zsh-users/zsh-autosuggestions.git $ZSH_CUSTOM/plugins/zsh-autosuggestions`
- Download zsh-syntax-highlighting by
`git clone https://github.com/zsh-users/zsh-syntax-highlighting.git $ZSH_CUSTOM/plugins/zsh-syntax-highlighting`
- `nano ~/.zshrc` find `plugins=(git)`
- Append `zsh-autosuggestions & zsh-syntax-highlighting` to `plugins()` like this
`plugins=(git zsh-autosuggestions zsh-syntax-highlighting)`
- Reopen terminal
###
## Changer de shell par défaut
Si vous êtes convaincu, il est temps de changer votre shell par défaut grâce à la commande suivante :
```
$ chsh -s /bin/zsh
```
Commencez par vous amuser un peu avec les fonctionnalités de base de Zsh, notamment celles que je vous ai présenté dans la section précédente. Vous ne devriez pas être perdu puisque toute la base du fonctionnement est très similaire à Bash.
# Synology
# Debian Chroot sur Synology DSM6
> Que ce soit pour le fun ou par nécessité, comme dans ce cas, sachez qu’on peut installer Debian (en environnement [chrooté](https://fr.wikipedia.org/wiki/Chroot) donc sans risque) sur un NAS Synology. Ici sur DSM6 dernière version.
### **Installer Debian Chroot**
Plutôt que de continuer à tout passer au crible avec [df, ls et du](https://technique.arscenic.org/commandes-linux-de-base/la-gestion-des-fichiers-et/article/lister-les-fichiers-et-repertoires) j’ai voulu installer [ncdu](https://upandclear.org/2016/02/28/lister-les-gros-dossiersfichiers-sous-linux-de-maniere-simple/) (via [IPKG](https://www.skyminds.net/nas-synology-installer-ipkg-pour-ajouter-des-applications-supplementaires/)) mais ça ne fonctionnait pas. j’ai donc pris le parti, rapide, d’installer un chroot Debian via les dépôts [SynoCommunity](https://upandclear.org/2015/09/16/synology-installer-les-paquets-synocommunity/) ([wiki](https://github.com/SynoCommunity/spksrc/wiki/Debian-Chroot) GitHub) qui permet d’installer Debian dans un dossier chrooté (sans risque de faire une boulette sur le NAS) sur Synology.
[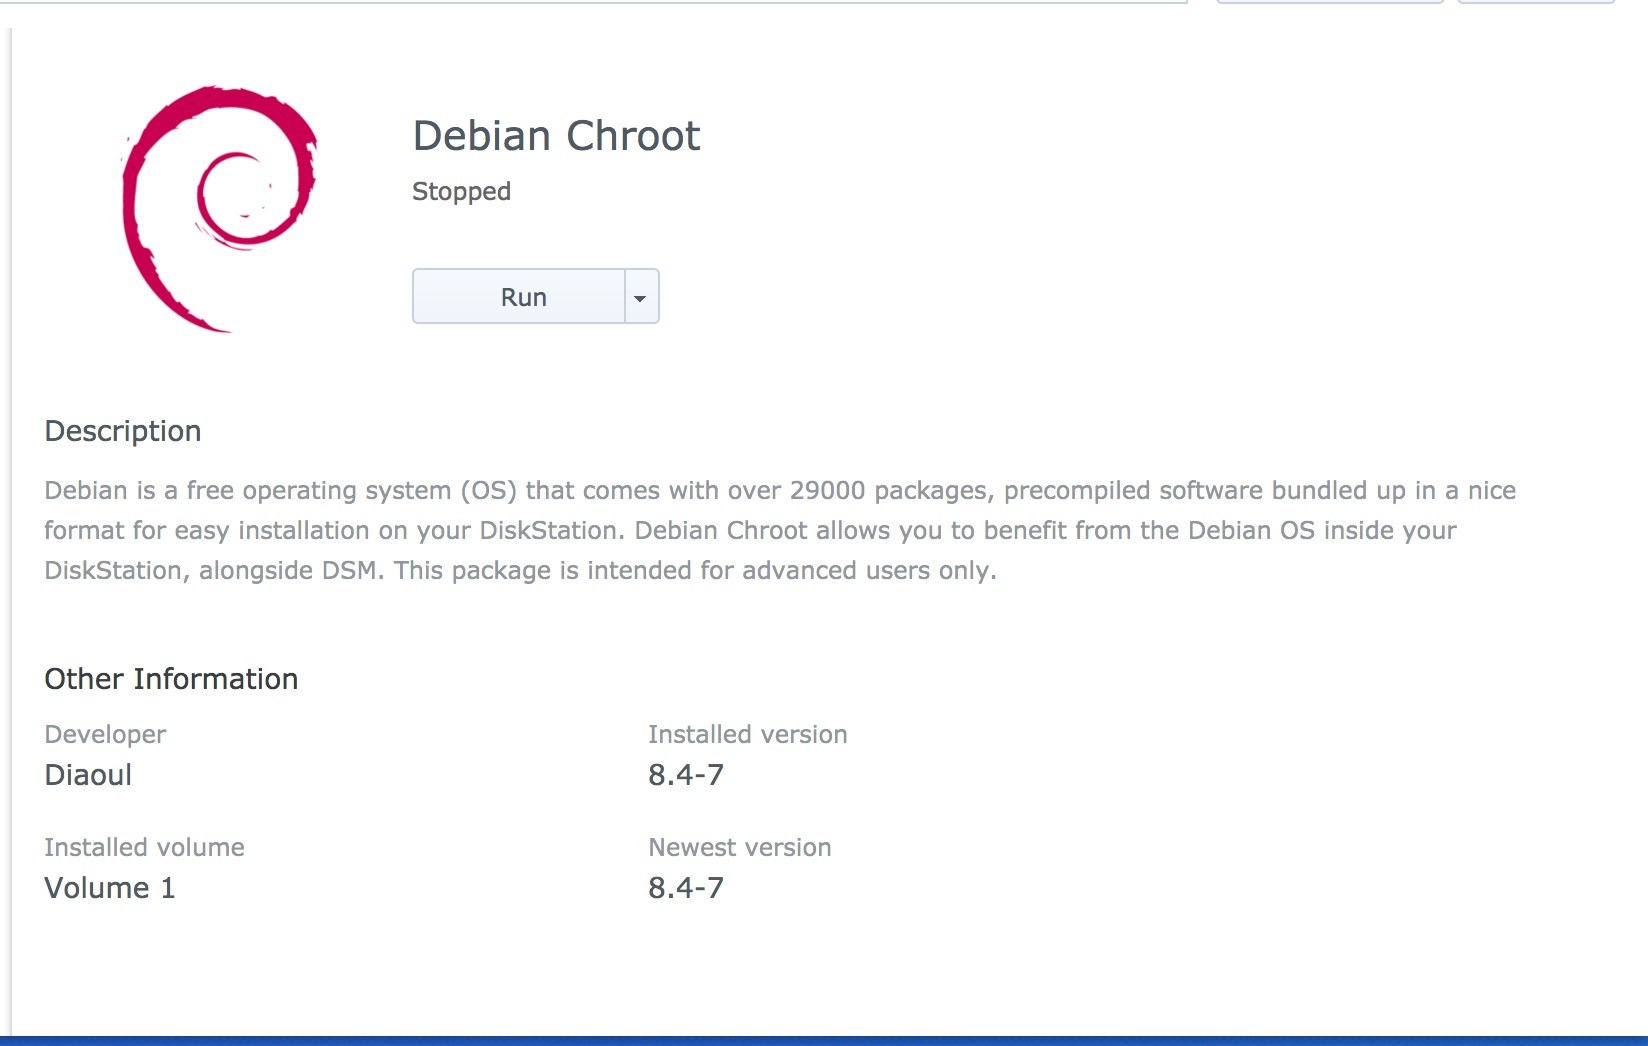](https://docs.wlan.ovh/uploads/images/gallery/2020-05/DebianChrootStoppedButRealRunning.jpg)
#### Téléchargement
- [Tenhow.debian-chroot.dsm6.\[1/2\].bromolow](https://www.dropbox.com/s/r4udr737knvv3jo/tenhow.debian-chroot.dsm6.%5B1%3A2%5D.bromolow.zip?dl=0) \[as DS3615xs\] \[Required by myself\] √
- [Tenhow.debian-chroot.dsm6.\[1/2\].braswell](https://www.dropbox.com/s/trav40yk89sghgc/tenhow.debian-chroot.dsm6.%5B1%20or%202%5D.braswell.zip?dl=0) \[as DS3617xs\] \[Required by myself\]
- [Tenhow.debian-chroot.dsm6.\[1/2\].apollolake](https://www.dropbox.com/s/aef5a6a70tparbc/tenhow.debian-chroot.dsm6.%5B1%3A2%5D.apollolake.zip?dl=0) \[as DS918+\] \[Required by lordvalium\] √
[python-2.7.dsm6.\[1/2\].apollolake](https://www.dropbox.com/s/m6hvsjs0mucmigx/python_apollolake-_2.7.14-19.spk?dl=0) \[python-2.7 for DS918+\]
- [Tenhow.debian-chroot.dsm6.\[1/2\].cedarview](https://www.dropbox.com/s/85kzm6pgm90imnr/tenhow.debian-chroot.dsm6.%5B1%3A2%5D.cedarview.zip?dl=0) \[as DS1213+\] \[Required by Tao87-04\] √
- [Tenhow.debian-chroot.dsm6.\[1/2\].armadaxp](https://www.dropbox.com/s/04ivz8nfztg2fe9/tenhow.debian-chroot.dsm6.%5B1%3A2%5D.armadaxp.zip?dl=0) \[as RS815\] \[Required by DzikNsk\] \[No Feedback Yet\]
- [Tenhow.debian-chroot.dsm6.\[1/2\].88f628x](https://www.dropbox.com/s/w4psq4m4dgpdy4m/tenhow.debian-chroot.dsm6.%5B1%3A2%5D.88f628x.zip?dl=0) \[as DS212\] \[Required by balabalaman\] √
- [Tenhow.debian-chroot.dsm6.\[1/2\].armada375](https://www.dropbox.com/s/9lqepe0jf2dub44/debian-chroot_armada375-_8.4-7.spk?dl=0) \[as DS215j\] \[Required by paul-xor\] \[Build by @destoron\]
- [Tenhow.debian-chroot.dsm6.\[1/2\].monaco](https://www.dropbox.com/s/3a6ocgfvdshzixr/tenhow.debian-chroot.dsm6.%5B1%3A2%5D.monaco.zip?dl=0) \[as DS216play\] \[Required by d4n1elchen\] √
- [Tenhow.debian-chroot.dsm6.\[1/2\].armada38x](https://www.dropbox.com/s/71p8e49dwbuv3zu/tenhow.debian-chroot.dsm6.%5B1%3A2%5D.armada38x.zip?dl=0) \[as DS216j\] \[Required by d4n1elchen\] √
- [Tenhow.debian-chroot.dsm6.\[1/2\].rtd1296](https://www.dropbox.com/s/6oc6ioc2c7abqti/tenhow.debian-chroot.dsm6.%5B1%3A2%5D.rtd1296.zip?dl=0) \[as DS418\] \[Required by gypittmann\] \[!Not Tested Yet!\]
- [Tenhow.debian-chroot.dsm6.\[1/2\].avaton](https://www.dropbox.com/s/qroxml7bi7xy2oq/tenhow.debian-chroot.dsm6.%5B1%3A2%5D.avoton.zip?dl=0) \[as DS1817+\] \[Required by droidboxma\] √
- [Tenhow.debian-chroot.dsm6.\[1/2\].evansport](https://www.dropbox.com/s/2cmi66fp0mst949/tenhow.debian-chroot.dsm6.%5B1%20or%202%5D.evansport.zip?dl=0) \[as DS214Play/DS415\] \[Required by rasmusmaagaard and g91720\]
- [Tenhow.debian-chroot.dsm6.\[1/2\].qoriq](https://www.dropbox.com/s/t328ef3hyuhe9ko/debian-chroot_qoriq-_8.4-7.spk?dl=0) \[as DS213+\] \[Required by Yagz\]
Comme Debian est installé dans un environnement “à part” on n’a pas accès au /Volume1, volume de stockage par défaut d’un NAS Synology. Du coup il faut modifier le script de lancement de l’environnement Debian. Ce qui se fait très simplement en SSH, en root, avec nano.
SSH : à activer dans Panneau de Configuration / Terminal et SNMP
pour passer root en SSH, sur DSM6, il faut taper sudo su et mettre le pwd du compte “Admin”
> Nano : cet éditeur n’étant pas installé sur Synology il faut le faire via les paquets SynoCommunity
Et donc éditer ensuite le script de lancement du chroot :
```prettyprint
nano /var/packages/debian-chroot/scripts/start-stop-status
```
Aller à la ligne *\# Mount if install is finished* et ajouter en fin de bloc la commande pour y monter automatiquement le /Volume1
```prettyprint
grep -q "${CHROOTTARGET}/volume1 " /volume1 || mount -o bind /volume1 ${CHROOTTARGET}/volume1
```
Ce qui nous donne
```prettyprint
# Mount if install is finished
if [ -f ${INSTALL_DIR}/var/installed ]; then
# Make sure we don't mount twice
grep -q "${CHROOTTARGET}/proc " /proc/mounts || mount -t proc proc ${CHROOTTARGET}/proc
grep -q "${CHROOTTARGET}/sys " /proc/mounts || mount -t sysfs sys ${CHROOTTARGET}/sys
grep -q "${CHROOTTARGET}/dev " /proc/mounts || mount -o bind /dev ${CHROOTTARGET}/dev
grep -q "${CHROOTTARGET}/dev/pts " /proc/mounts || mount -o bind /dev/pts ${CHROOTTARGET}/dev/pts
grep -q "${CHROOTTARGET}/volume1 " /volume1 || mount -o bind /volume1 ${CHROOTTARGET}/volume1
```
Il faut ensuite ajouter la commande de démontage à la fin du bloc *\# Unmount*
```prettyprint
umount ${CHROOTTARGET}/volume1
```
Ce qui donne
```prettyprint
{
# Stop running services
${INSTALL_DIR}/app/stop.py
# Unmount
umount ${CHROOTTARGET}/dev/pts
umount ${CHROOTTARGET}/dev
umount ${CHROOTTARGET}/sys
umount ${CHROOTTARGET}/proc
umount ${CHROOTTARGET}/volume1
}
```
On enregistre (ctrl o) et quitte (ctrl x).
##### **Lancer Debian Chroot et s’y placer**
Toujours en root, on peut ensuite lancer le script de chroot Debian
```prettyprint
/var/packages/debian-chroot/scripts/start-stop-status start
```
Les commandes sont très simples :
- start : le lancer
- stop : le stopper
- status : voir s’il est lancé ou non
- chroot : s’y placer en chroot (donc passer dans Debian, en root)
Du coup on peut ensuite s’y placer
```prettyprint
/var/packages/debian-chroot/scripts/start-stop-status chroot
```
####
#### Optimisation
1. `apt update`
2. `apt upgrade`
3. `dpkg-reconfigure tzdata`
4. `apt install locales`
5. `dpkg-reconfigure locales`
##### **Installer htop** (ou ce que vous voulez)
C’est un Debian classique. On peut donc y faire un `apt-get update && apt-get upgrade` histoire d’avoir un environnement à jour. Et j’ai ensuite installé htop.
```shell
apt-get install htop
```
# Shell
# Awesome Shell [](https://github.com/sindresorhus/awesome)
A curated list of awesome command-line frameworks, toolkits, guides and gizmos. Inspired by awesome-php. This awesome collection is also available on [Unix-Shell.ZEEF.com](https://unix-shell.zeef.com/caleb.xu).
```
█████╗ ██╗ ██╗███████╗███████╗ ██████╗ ███╗ ███╗███████╗
██╔══██╗██║ ██║██╔════╝██╔════╝██╔═══██╗████╗ ████║██╔════╝
███████║██║ █╗ ██║█████╗ ███████╗██║ ██║██╔████╔██║█████╗
██╔══██║██║███╗██║██╔══╝ ╚════██║██║ ██║██║╚██╔╝██║██╔══╝
██║ ██║╚███╔███╔╝███████╗███████║╚██████╔╝██║ ╚═╝ ██║███████╗
╚═╝ ╚═╝ ╚══╝╚══╝ ╚══════╝╚══════╝ ╚═════╝ ╚═╝ ╚═╝╚══════╝
███████╗██╗ ██╗███████╗██╗ ██╗
██╔════╝██║ ██║██╔════╝██║ ██║
███████╗███████║█████╗ ██║ ██║
╚════██║██╔══██║██╔══╝ ██║ ██║
███████║██║ ██║███████╗███████╗███████╗
╚══════╝╚═╝ ╚═╝╚══════╝╚══════╝╚══════╝
```
- [Shells](https://github.com/alebcay/awesome-shell#shells)
- [Command-Line Productivity](https://github.com/alebcay/awesome-shell#command-line-productivity)
- [Customization](https://github.com/alebcay/awesome-shell#customization)
- [For Developers](https://github.com/alebcay/awesome-shell#for-developers)
- [System Utilities](https://github.com/alebcay/awesome-shell#system-utilities)
- [Downloading and Serving](https://github.com/alebcay/awesome-shell#downloading-and-serving)
- [Multimedia and File Formats](https://github.com/alebcay/awesome-shell#multimedia-and-file-formats)
- [Applications](https://github.com/alebcay/awesome-shell#applications)
- [Games](https://github.com/alebcay/awesome-shell#games)
- [Shell Package Management](https://github.com/alebcay/awesome-shell#shell-package-management)
- [Shell Script Development](https://github.com/alebcay/awesome-shell#shell-script-development)
- [Guides](https://github.com/alebcay/awesome-shell#guides)
- [**Awesome Zsh**](https://github.com/unixorn/awesome-zsh-plugins) [](https://github.com/unixorn/awesome-zsh-plugins)
- [**Awesome Fish**](https://github.com/jorgebucaran/awesome-fish) [](https://github.com/jorgebucaran/awesome-fish)
- [Other Awesome Lists](https://github.com/alebcay/awesome-shell#other-awesome-lists)
## [](https://github.com/alebcay/awesome-shell#shells)Shells
*Choose your base shell.*
- [bash](https://www.gnu.org/software/bash/) - GNU Project's shell (Bourne Again SHell)
- [elvish](https://elv.sh/) - Friendly, expressive shell features like anonymous functions and data structures
- [fish](https://fishshell.com/) - Smart and user-friendly command line shell
- [ion](https://github.com/redox-os/ion) - A modern system shell that features a simple, yet powerful, syntax. It is written entirely in Rust.
- [ksh93](https://github.com/att/ast) - Korn Shell
- [mksh](https://github.com/MirBSD/mksh) - MirBSD Korn Shell
- [nushell](https://github.com/nushell/nushell) - A modern shell written in Rust
- [oksh](https://github.com/ibara/oksh) - Portable OpenBSD ksh
- [osh](https://www.oilshell.org/) - Bash compatible, with new/modern Unix shell language called Oil
- [pdksh](https://cvsweb.openbsd.org/cgi-bin/cvsweb/src/bin/ksh/) - Public domain Korn shell
- [shell++](https://github.com/alexst07/shell-plus-plus) - Friendly and modern functional and object oriented shell script language
- [shenv](https://github.com/shenv/shenv) - Simple shell version management
- [tcsh](https://www.tcsh.org/) - C shell with file name completion and command line editing
- [xiki](https://xiki.org/) - Makes the shell console more friendly and powerful
- [xonsh](https://xon.sh/) - Python-ish, BASHwards-looking shell language and command prompt
- [yash](https://yash.osdn.jp/) - A POSIX-compliant command line shell with built-in support for completion and prediction based on command history
- [zsh](https://www.zsh.org/) - Powerful shell with scripting language
## [](https://github.com/alebcay/awesome-shell#command-line-productivity)Command-Line Productivity
*Search, bookmarks, multiplexing, and other tools that make your terminal experience more productive.*
- [AdvancedNewFile](https://github.com/tanrax/terminal-AdvancedNewFile) - Fast creation of files and directories in a recursive way. Inspired by the Vim plugin.
- [ag](https://github.com/ggreer/the_silver_searcher) - Super fast string search through a directory hierarchy
- [aliases](https://github.com/sebglazebrook/aliases) - Contextual, dynamic, organized aliases for bash
- [aliasme](https://github.com/Jintin/aliasme) - alias helper to change directory quickly
- [autoenv](https://github.com/inishchith/autoenv) - Directory-based environments
- [autojump](https://github.com/wting/autojump) - A cd command that learns - easily navigate directories from the command line
- [bashhub](https://github.com/rcaloras/bashhub-client) - ☁️ Bash history in the cloud. Indexed and searchable.
- [bashmarks](https://github.com/huyng/bashmarks) - Directory bookmarks for the shell
- [bd](https://github.com/vigneshwaranr/bd) - Quickly go back to a parent directory
- [boilr](https://github.com/tmrts/boilr) - A blazingly fast CLI tool for creating projects from boilerplate templates.
- [boom](https://github.com/holman/boom) - Store links and snippets in the command line
- [borg](https://github.com/ok-borg/borg) - A terminal based search engine for bash commands
- [browsh](https://github.com/browsh-org/browsh) - The modern text-based browser
- [Buku](https://github.com/jarun/Buku) - Powerful command-line bookmark manager
- [byobu](https://www.byobu.org/) - Text-based window manager and terminal multiplexer
- [cod](https://github.com/dim-an/cod) — A completion daemon for shell that learns when you invoke `--help` commands
- [commacd](https://github.com/shyiko/commacd) - A faster way to move around in Bash
- [CloudClip](https://github.com/skywind3000/CloudClip) - Your own clipboard in the cloud, copy and paste text with gist between different systems
- [ddgr](https://github.com/jarun/ddgr) - DuckDuckGo from the terminal
- [desk](https://github.com/jamesob/desk) - A lightweight workspace manager for the shell
- [direnv](https://github.com/direnv/direnv) - An environment switcher for the shell, compare with autoenv
- [dnote](https://github.com/dnote/dnote) - A simple command line notebook with multi-device sync and web interface
- [enhancd](https://github.com/b4b4r07/enhancd) - 🚀 A next-generation cd command with an interactive filter
- [eureka](https://github.com/simeg/eureka/) - 💡 CLI tool to input and store your ideas without leaving the terminal
- [fasd](https://github.com/clvv/fasd) - Command-line productivity booster, offers quick access to files and directories
- [fd](https://github.com/sharkdp/fd) - A simple, fast and user-friendly alternative to find.
- [foxy](https://github.com/s-p-k/foxy) - Plain text bookmarks for Firefox and surf browsers.
- [fselect](https://github.com/jhspetersson/fselect) - Find files with SQL-like queries.
- [funky](https://github.com/bbugyi200/funky) - Extends functionality of shell functions making them more powerful and flexible.
- [fz](https://github.com/changyuheng/fz) - Seamless fuzzy tab completion for z
- [fzf](https://github.com/junegunn/fzf) - A command-line fuzzy finder
- [gitmux](https://github.com/arl/gitmux) - Show Git status in Tmux status bar
- [googler](https://github.com/jarun/googler) - Google Search, Google Site Search, Google News from the terminal
- [googlr](https://github.com/Astranno/googlr) - Command line tool that lets you search Google from your terminal.
- [goto](https://github.com/iridakos/goto) - A shell utility for navigation to aliased directories supporting auto-completion
- [has](https://github.com/kdabir/has) - `has` helps you check presence of various command line tools and their versions on path
- [how2](https://github.com/santinic/how2) - `how2` finds the simplest way to do something in a unix shell. It's like `man`, but you can query it in natural language.
- [navi](https://github.com/denisidoro/navi) - An interactive cheatsheet tool for the command-line
- [hhighlighter](https://github.com/paoloantinori/hhighlighter) - Colorize words in a command output
- [hr](https://github.com/LuRsT/hr) - `
` for your terminal
- [hss](https://github.com/six-ddc/hss) - An interactive parallel ssh client featuring autocomplete and asynchronous execution
- [hstr](https://github.com/dvorka/hstr) - Bash History Suggest Box
- [jump](https://github.com/gsamokovarov/jump) - Jump helps you navigate your file system faster by learning your habits.
- [k](https://github.com/supercrabtree/k) - k is a Zsh script to make directory listings more readable, adding Git status, fileweight colors and rotting dates
- [k alias](https://github.com/lingtalfi/k) - get kool aliases (and more) working with a simple one-liner
- [lazy-cd](https://github.com/pedramamini/lazy-cd) - Simple bash commands for bookmarked navigation of the file system, complete with bash-completion.
- [lf.sh](https://github.com/suewonjp/lf.sh) - Quickly search files with fewer typings and do many more (grepping, copying path to clipboard, etc)
- [Lmod](https://lmod.readthedocs.io/en/latest/) - Lua-based Environment Modules that enhances Tcl-based modules while being backward compatible (compare to modules)
- [loop](https://github.com/Miserlou/Loop) - Write and control complex loops with as one-liners
- [marker](https://github.com/pindexis/marker) - Bookmark your shell commands
- [mackup](https://github.com/lra/mackup/) - Keep your application settings in sync (OS X/Linux)
- [mcfly](https://github.com/cantino/mcfly) - Fly through your shell history. Great Scot!
- [modules](http://modules.sourceforge.net/) - Classical Tcl-based Environment Modules managing the shell environment (compare to Lmod, direnv, and autoenv)
- [nnn](https://github.com/jarun/nnn) - File browser and disk usage analyzer with excellent desktop integration
- [parallel](https://www.gnu.org/software/parallel/) - Build and execute shell command lines from standard input in parallel
- [pathpicker](https://github.com/facebook/PathPicker) - Accepts inputs like grep, searches, git etc; allows selecting files from the result of the input, which you can then open or provide as argument to a command.
- [pdd](https://github.com/jarun/pdd) - Tiny date, time diff calculator with timers
- [percol](https://github.com/mooz/percol) - Adds flavor of interactive filtering to the traditional pipe concept of UNIX shell
- [q](https://github.com/cal2195/q) - Vim like macro registers for your Bash and Zsh Shell
- [qfc](https://github.com/pindexis/qfc) - File-completion widget for Bash and Zsh
- [resh](https://github.com/curusarn/resh) - Contextual shell history for Zsh and Bash
- [rg](https://github.com/BurntSushi/ripgrep) - ripgrep is a line oriented search tool that combines the usability of The Silver Searcher with the raw speed of GNU grep
- [screen](https://www.gnu.org/software/screen/) - GNU terminal multiplexer
- [shell-history](https://github.com/pawamoy/shell-history) - Visualize your shell usage with Highcharts
- [SHML](https://github.com/odb/shml) - Style framework for the terminal (Shell Markup Language)
- [slugify](https://github.com/benlinton/slugify) - Command that converts filenames and directories to a web friendly format
- [sman](https://github.com/tokozedg/sman) - 🐛 A command-line snippet manager
- [spark](https://github.com/holman/spark) - ▁▂▃▅▂▇ in your shell
- [shark](https://github.com/jorgebucaran/fish-spark) - ▁▂▃▅ Sparkline Generator
- [sheet](https://github.com/oscardelben/sheet) - Text snippets for the command line
- [spot](https://github.com/rauchg/spot) - Tiny file search utility
- [snips](https://github.com/srijanshetty/snips) - Command line tool to manage snippets of code.
- [sqlline](https://github.com/julianhyde/sqlline) - Shell for issuing SQL to relational databases via JDBC (multiline, completion, highlighting, dialect support)
- [sshfs](https://github.com/osxfuse/sshfs) - A tool for mounting remote file systems over SSH
- [sudocabulary](https://github.com/badarsh2/Sudocabulary) - Learn English Vocabulary from your terminal
- [surfraw](https://gitlab.com/surfraw/Surfraw) - browse specific site and search the web from your terminal without browser.
- [task-manager](https://github.com/lingtalfi/task-manager) - Execute all your scripts with just two or three keystrokes.
- [td-cli](https://github.com/darrikonn/td-cli) - A todo command line manager to organize and manage your todos across multiple projects.
- [thefuck](https://github.com/nvbn/thefuck) - Fix common shell mistakes by using an easy to remember command
- [tldr](https://github.com/raylee/tldr) - A fully-functional bash client for tldr, simplified and community-driven man pages
- [tmux](https://tmux.github.io/) - Amazing terminal multiplexer
- [undollar](https://github.com/ImFeelingDucky/undollar) - undollar bites the dollar sign off the tip of the command you just pasted into your terminal
- [up](https://github.com/shannonmoeller/up) - Ascend directories by name or count; for bash, zsh, and fish.
- [v](https://github.com/rupa/v) - z for vim.
- [wemux](https://github.com/zolrath/wemux) - Multi-User Tmux Made Easy
- [xsv](https://github.com/BurntSushi/xsv) - a fast CSV command line toolkit written in Rust
- [xxh](https://github.com/xxh/xxh) - Bring your favorite shell wherever you go through the SSH.
- [z](https://github.com/rupa/z) - z is the new j, yo
- [z.lua](https://github.com/skywind3000/z.lua) - A new cd command that helps you navigate faster by learning your habits
## [](https://github.com/alebcay/awesome-shell#customization)Customization
*Custom prompts, color themes, etc.*
- [base16-builder](https://github.com/base16-builder/base16-builder) - Base16-Builder
- [bash-full-of-colors](https://github.com/slomkowski/bash-full-of-colors) - Powerful prompt with screen, tmux, git support and many more
- [bash-git-prompt](https://github.com/magicmonty/bash-git-prompt) - An informative and fancy Bash prompt for Git users
- [bash-powerline](https://github.com/riobard/bash-powerline) - Powerline-style Bash prompt in pure Bash script
- [bashstrap](https://github.com/barryclark/bashstrap) - A quick way to spruce up OSX terminal
- [bullet-train-oh-my-zsh-theme](https://github.com/caiogondim/bullet-train.zsh) - 🚄 An oh-my-zsh shell theme based on the Powerline Vim plugin
- [emojify](https://github.com/mrowa44/emojify) Emoji on the command line 😱
- [flatui-terminal-theme](https://dribbble.com/shots/1021755-Flat-UI-Terminal-Theme) - Nicer colors for terminal
- [geometry](https://github.com/geometry-zsh/geometry) - A minimal ZSH theme where any function can be added to the left prompt or (async) right prompt on the fly.
- [git-prompt](https://github.com/lvv/git-prompt) - Bash prompt with Git, SVN and HG modules
- [gittify](https://github.com/momeni/gittify) - A colorful Bash prompt + customized Git aliases
- [Gogh - Color Scheme](https://github.com/Mayccoll/Gogh) - Color Scheme for Gnome Terminal
- [liquidprompt](https://github.com/nojhan/liquidprompt) - A full-featured & carefully designed adaptive prompt for Bash & Zsh
- [mysql-colorize](https://github.com/zpm-zsh/mysql-colorize) - Colorization for mysql comand-line client
- [oh-my-git](https://github.com/arialdomartini/oh-my-git) - An opinionated git prompt for bash and zsh
- [polyglot](https://github.com/agkozak/polyglot) - An informative Git prompt that works in bash, zsh, ksh, mksh, pdksh, dash, and busybox sh
- [sexy-bash-prompt](https://github.com/twolfson/sexy-bash-prompt) - Bash prompt with colors, Git statuses, and Git branches
- [synth-shell](https://github.com/andresgongora/synth-shell) - Greeter with a customizable status report and a fancy bash prompt
## [](https://github.com/alebcay/awesome-shell#for-developers)For Developers
*Command-line development, version control, and deployment.*
- [ack](https://beyondgrep.com/) - A grep-like search tool optimized for source code.
- [add-gitignore](https://github.com/TejasQ/add-gitignore) - Interactive CLI that generates a .gitignore for your project based on your needs.
- [bcal](https://github.com/jarun/bcal) - Byte CALculator for storage conversions and calculations
- [bitwise](https://github.com/mellowcandle/bitwise) - Terminal based interactive bit manipulator in curses.
- [bocker](https://github.com/p8952/bocker) - Docker implemented in 100 lines of bash
- [cloc](https://github.com/AlDanial/cloc) - Count Lines of Code
- [doclt](https://github.com/omgimanerd/doclt) - A command line interface to Digital Ocean
- [dokku](https://github.com/dokku/dokku) - Docker powered mini-Heroku. The smallest PaaS implementation you've ever seen.
- [fish-getopts](https://github.com/jorgebucaran/fish-getopts) - CLI parser for fish
- [forgit](https://github.com/wfxr/forgit) - Utility tool for `git` taking advantage of fuzzy finder fzf.
- [git-extra-commands](https://github.com/unixorn/git-extra-commands) - Many Git extra utilities. Churn, cut-branch, improved-merge and many more.
- [git-extras](https://github.com/tj/git-extras) - Git utilities -- repo summary, repl, changelog population, author commit percentages and more
- [git-open](https://github.com/paulirish/git-open) - Type `git open` to open the GitHub page or website for a repository in your browser
- [git-quick-stats](https://github.com/arzzen/git-quick-stats) - Git quick statistics is a simple and efficient way to access various statistics in git repository.
- [git-semver](https://github.com/markchalloner/git-semver) - Git plugin for easing semantic versioning and changelog validation
- [git-sh](https://github.com/rtomayko/git-sh) - A customized Bash environment suitable for Git work
- [hub](https://github.com/github/hub) - hub helps you win at git.
- [licins](https://github.com/dogoncouch/licins) - Insert commented software licenses into source code.
- [mkdkr](https://github.com/rosineygp/mkdkr) - Makefile + Docker = CI Pipeline
- [mr](https://myrepos.branchable.com/) - Multiple Repository management tool
- [overcommit](https://github.com/sds/overcommit) - A fully configurable and extendable Git hook manager
- [pre-commit](https://pre-commit.com/) - A framework for managing and maintaining multi-language pre-commit hooks
- [rebound](https://github.com/shobrook/rebound) - Instantly browse Stack Overflow results in your terminal when you get a compiler error
- [repren](https://github.com/jlevy/repren) - Command-line search-and-replace and file-renaming swiss army knife
- [slap](https://github.com/slap-editor/slap) - Sublime-like terminal-based text editor that runs on Node.js
- [shipit](https://github.com/sapegin/shipit) - Minimalistic SSH deployment
- [starring](https://github.com/ritz078/starring) - Automatically star the npm-packages that you are using on GitHub.
- [tag](https://github.com/aykamko/tag) - Instantly jump to your ag matches.
- [wipe-modules](https://github.com/bntzio/wipe-modules) - A little agent that removes the node\_modules folder of non-active projects
- [xtm](https://github.com/Camji55/xtm) - Command line tool that helps you manage your Xcode project templates.
## [](https://github.com/alebcay/awesome-shell#system-utilities)System Utilities
*OS-related tools, including system administration, system debugging, and file and process management.*
- [atop](https://www.atoptool.nl/) - ASCII full-screen performance monitor that is capable of reporting the activity of all processes
- [bat](https://github.com/sharkdp/bat) - A `cat` clone with wings
- [bmon](https://github.com/tgraf/bmon) - Real-time network bandwidth monitor and rate estimator with human-friendly visual output
- [catcli](https://github.com/deadc0de6/catcli) - The command line catalog tool for your offline data
- [ccat](https://github.com/jingweno/ccat) - ccat is the colorizing cat. It works similar to cat but displays content with syntax highlighting.
- [exa](https://github.com/ogham/exa) - A modern version of `ls`.
- [progress](https://github.com/Xfennec/progress) - Linux tool to show progress for `cp`, `rm`, `dd`, and more...
- [stronghold](https://github.com/alichtman/stronghold) - Easily configure MacOS security settings from the terminal.
- [glances](https://github.com/nicolargo/glances) - Glances an Eye on your system
- [goaccess](https://github.com/allinurl/goaccess) - GoAccess is a real-time web log analyzer and interactive viewer that runs in a terminal in \*nix systems.
- [hblock](https://github.com/hectorm/hblock) - Hosts-file based adblocker
- [histstat](https://github.com/vesche/histstat) - History for netstat
- [htop](https://github.com/hishamhm/htop) - A ncurses based interactive process viewer which aims to be a better `top`
- [lnav](https://lnav.org/) - An advanced log file viewer for the small-scale
- [logdissect](https://github.com/dogoncouch/logdissect) - CLI utility and Python API for analyzing log files and other data.
- [ls++](https://github.com/trapd00r/ls--) - Colorized ls on steroids
- [lsp](https://github.com/dborzov/lsp) - An improved `ls`, with file descriptions in plain language and intelligent file grouping
- [maza](https://github.com/tanrax/maza-ad-blocking) - Local ad blocker. Like Pi-hole but local and using your operating system.
- [mtr](https://github.com/traviscross/mtr) - The functionality of the 'traceroute' and 'ping' programs in a single network diagnostic tool.
- [ncdu](https://dev.yorhel.nl/ncdu) - NCurses Disk Usage
- [nmtui](https://github.com/NetworkManager/NetworkManager) - Text User Interface for controlling NetworkManager
- [powertop](https://github.com/fenrus75/powertop) - Battery/Power usage and device stats monitoring command-line tool, with tune-up options.
- [procdog](https://github.com/jlevy/procdog) - Lightweight command-line control of long-lived processes like servers
- [quick-secure](https://github.com/marshyski/quick-secure) - Quickly secure and harden UNIX/Linux systems
- [rng](https://github.com/nickolasburr/rng) - Copy range of lines from file or stdin to stdout.
- [wifi-wand](https://github.com/keithrbennett/wifiwand) - a Ruby command line application for managing WiFi on MacOS (install by `gem install wifi-wand`)
- [xiringuito](https://github.com/ivanilves/xiringuito) - SSH-based "VPN for poors"
## [](https://github.com/alebcay/awesome-shell#downloading-and-serving)Downloading and Serving
*Self-hosted, lightweight servers and networking tools written in shell scripts.*
- [aria2](https://github.com/aria2/aria2) - aria2 is a lightweight multi-protocol & multi-source, cross platform download utility operated in command-line. It supports HTTP/HTTPS, FTP, BitTorrent and Metalink
- [balls](https://github.com/jneen/balls) - Bash on Balls
- [bashttpd](https://github.com/avleen/bashttpd) - A web server written in Bash
- [bashhub-server](https://github.com/nicksherron/bashhub-server) - Private cloud shell history. Open source server for bashhub
- [bitpocket](https://github.com/sickill/bitpocket) - "DIY Dropbox" or "2-way directory (r)sync with proper deletion"
- [Dropbox-Uploader](https://github.com/andreafabrizi/Dropbox-Uploader) - Dropbox Uploader is a Bash script which can be used to upload, download, list or delete files from Dropbox
- [httpie](https://github.com/jakubroztocil/httpie) - HTTPie is a command line HTTP client, a user-friendly cURL replacement
- [HTTPLab](https://github.com/gchaincl/httplab) - The interactive web server, let you inspect HTTP requests and forge responses.
- [ngincat](https://github.com/jaburns/ngincat) - Tiny Bash HTTP server using netcat
- [resty](https://github.com/micha/resty) - Little command line REST client that you can use in pipelines
- [shell2http](https://github.com/msoap/shell2http) - HTTP-server to execute shell commands. Designed for development, prototyping or remote control
- [vesper](https://github.com/chris-rock/vesper) - 🍸Vesper is a HTTP framework for Bash/Unix Shell
- [youtube-dl](https://github.com/ytdl-org/youtube-dl) - Small command-line program to download videos from YouTube.com and other video sites
## [](https://github.com/alebcay/awesome-shell#multimedia-and-file-formats)Multimedia and File Formats
*Tools for handling video and audio files.*
- [adb-export](https://github.com/sromku/adb-export) - Export Android content providers to CSV format
- [Android-Kitchen](https://github.com/dsixda/Android-Kitchen) - A text-based kitchen for Android ROM customization. Uses shell scripts and works with Cygwin/OS X/Linux
- [Beets](https://github.com/beetbox/beets) - Music library manager and MusicBrainz tagger
- [cmus](https://github.com/cmus/cmus) - Cross-platform cli audio player.
- [fx](https://github.com/antonmedv/fx) - Command-line JSON processing tool by anononymus JavaScript functions
- [gifgen](https://github.com/lukechilds/gifgen) - Simple high quality GIF encoding
- [image-scraper](https://github.com/sananth12/ImageScraper) - A cool command line image scraper with a lot of features.
- [imgp](https://github.com/jarun/imgp) - Blazing fast batch image resizer and rotator
- [jo](https://github.com/jpmens/jo) - A small utility to create JSON objects from command-line arguments.
- [jq](https://github.com/stedolan/jq) - Sed for json data. You can use it to slice and filter and map and transform structured data
- [korkut](https://github.com/oguzhaninan/korkut) - Quick and simple image processing at the command line.
- [mpv](https://mpv.io/) - Lets you play most audio and video formats (using ASCII characters) in the shell as well as in a GUI.
- [nehm](https://github.com/bogem/nehm) - Console tool, which downloads, sets IDv3 tags and adds to your iTunes (if you use it) your SoundCloud likes in convenient way
- [PiCAST](https://github.com/lanceseidman/PiCAST) - PiCAST turns your $35 Raspberry Pi in to a Chromecast like Device
- [sejda](https://github.com/torakiki/sejda/) - Command line manipulation of PDF documents (split, merge, rotate, convert to jpg, extract text, etc)
- [xidel](https://github.com/benibela/xidel/) - Cli tool to filter, map and create HTML/XML/JSON data with (Turing-complete) XPath and XQuery.
- [xmlstarlet](http://xmlstar.sourceforge.net/) - Old but powerful tool for command-line XML formatting, filtering, and manipulation.
## [](https://github.com/alebcay/awesome-shell#applications)Applications
*Command line-based applications or command line access to existing services.*
- [ansiweather](https://github.com/fcambus/ansiweather) - Weather in your terminal, with ANSI colors and Unicode symbols
- [awless](https://github.com/wallix/awless) - A powerful, innovative and small surface CLI to manage AWS.
- [bashblog](https://github.com/cfenollosa/bashblog) - A Bash script that handles blog posting
- [carbon-now-cli](https://github.com/mixn/carbon-now-cli) - 🎨 Beautiful images of your code — from right inside your terminal.
- [choosealicense-cli](https://github.com/lord63/choosealicense-cli) - Choose an OSS license from the comfort of your terminal
- [cointop](https://github.com/miguelmota/cointop) - The fastest and most interactive terminal based UI application for tracking cryptocurrencies
- [facebook-cli](https://github.com/specious/facebook-cli) - Facebook command line tool
- [fanyi](https://github.com/afc163/fanyi) - Translate English to Chinese in terminal
- [gcalcli](https://github.com/insanum/gcalcli) - Google Calendar command line interface
- [geeknote](https://github.com/VitaliyRodnenko/geeknote) - Command line evernote client
- [haxor-news](https://github.com/donnemartin/haxor-news) - Browse Hacker News like a haxor
- [hn-cli](https://github.com/rafaelrinaldi/hn-cli) - Browse Hacker News from the comfort of your Terminal
- [iponmap](https://github.com/nogizhopaboroda/iponmap) - Draw point on world map using ip address
- [isitup](https://github.com/lord63/isitup) - Check whether a website is up or down
- [jrnl](https://github.com/jrnl-org/jrnl) - A simple command line journal application that stores your journal in a plain text file
- [ledger](https://github.com/ledger/ledger) - Command line accounting
- [licen](https://github.com/lord63/licen) - Generate your license. Yet another lice, but implement with Jinja2 and docopt
- [md2png](https://github.com/weaming/md2png) - Convert markdown to PNG image
- [moviemon](https://github.com/iCHAIT/moviemon) - Everything about your movies within the command line.
- [pockyt](https://github.com/arvindch/pockyt) - Read, Manage, and Automate your [Pocket](https://getpocket.com/) collection.
- [pushblast](https://github.com/alebcay/pushblast) - Get PushBullet notifications when a shell program exits
- [pushbullet-bash](https://github.com/Red5d/pushbullet-bash) - Bash interface to the PushBullet API
- [ranger](https://github.com/ranger/ranger) - A console file manager with VI key bindings.
- [Reddit Terminal Viewer](https://github.com/michael-lazar/rtv) - Browse Reddit from your terminal
- [SAWS](https://github.com/donnemartin/saws) - A Supercharged AWS CLI
- [taskbook](https://github.com/klaussinani/taskbook) - Tasks, boards & notes for the command-line habitat
- [taskwarrior](https://taskwarrior.org/) - A command-line TODO list manager
- [terjira](https://github.com/keepcosmos/terjira) - Command line power tool for Jira
- [transfer.sh](https://transfer.sh/) — Quickly upload and share files from your shell
- [vl](https://github.com/ellisonleao/vl) - URL link checker on text documents
- [wego](https://github.com/schachmat/wego) - Weather app for the terminal
- [whales](https://github.com/Gueils/whales) - A tool to automatically dockerize your applications
- [whereami](https://github.com/rafaelrinaldi/whereami) - Get your geolocation information from the CLI
- [wttr.in](https://github.com/chubin/wttr.in) - ⛅ The right way to check the weather (curl wttr.in)
## [](https://github.com/alebcay/awesome-shell#games)Games
*All work and no play is a cruddy way to spend your day.*
- [bash2048](https://github.com/mydzor/bash2048) - Bash implementation of 2048 game
- [minesweeper](https://github.com/feherke/Bash-script/tree/master/minesweeper) - Bash implementation of minesweeper
- [nudoku](https://github.com/jubalh/nudoku) - ncurses based sudoku game written in C
- [piu-piu](https://github.com/vaniacer/piu-piu-SH) - Horizontal scroller game in bash with multiplayer mode!
- [sedtris](https://github.com/uuner/sedtris) - Tetris in sed
- [sed-scripts](https://github.com/aureliojargas/sed-scripts) - Arkanoid and Sokoban written using sed
- [SHTAP](https://notimetoplay.org/engines/shtap/) - Reusable text adventure engine for Bash 4
- [tty-solitaire](https://github.com/mpereira/tty-solitaire) - Play solitaire in your terminal!
## [](https://github.com/alebcay/awesome-shell#shell-package-management)Shell Package Management
*Tools for managing multiple shell configurations. For zsh-specific tools, see the Zsh section.*
- [bash-it](https://github.com/Bash-it/bash-it) - A community Bash framework
- [basher](https://github.com/basherpm/basher) - A package manager for shell scripts
- [bashing](https://github.com/xsc/bashing) - Smashing Bash into Pieces
- [bpkg](https://www.bpkg.sh/) - JavaScript has npm, Ruby has Gems, Python has pip and now Shell has bpkg
- [dotdrop](https://github.com/deadc0de6/dotdrop) - Save your dotfiles once, deploy them everywhere
- [dotfiler](https://github.com/svetlyak40wt/dotfiler) – Shell agnostic git based dotfiles package manager, written in Python.
- [fresh](https://github.com/freshshell/fresh) - Keep your dotfiles fresh
- [homeshick](https://github.com/andsens/homeshick) - Git dotfile synchronizer written in Bash
- [shallow-backup](https://github.com/alichtman/shallow-backup) - Easily create lightweight documentation of installed packages, dotfiles, and more
- [shundle](https://github.com/javier-lopez/shundle) - Plugin manager for shell scripts
- [vcsh](https://github.com/RichiH/vcsh) - Config manager based on Git
- [yadm](https://yadm.io/) - Git-based dotfiles manager supporting encryption, alternates, and bootstrapping
## [](https://github.com/alebcay/awesome-shell#shell-script-development)Shell Script Development
*Tools for writing, improving, or organizing Bash or other shell scripts*
- [ansi](https://github.com/fidian/ansi) - ANSI escape codes in pure bash - change text color, position the cursor, much more
- [assert.sh](https://github.com/lehmannro/assert.sh) - Bash unit testing framework
- [bashful](https://github.com/jmcantrell/bashful) - A collection of libraries to simplify writing Bash scripts
- [Bashlets](https://github.com/reale/bashlets) - A modular extensible toolbox for Bash
- [bashmanager](https://github.com/lingtalfi/bashmanager) - mini bash framework for creating command line tools
- [bashwithnails](https://github.com/mindaugasbarysas/bashwithnails) - a Bash framework written just for fun with testing, dependency management & packaging
- [bash-language-server](https://github.com/bash-lsp/bash-language-server) - [LSP](https://microsoft.github.io/language-server-protocol/)-based Bash language server
- [bats](https://github.com/bats-core/bats-core) - Bash Automated Testing System
- [crash](https://github.com/molovo/crash) - Proper error handling, exceptions and try/catch for ZSH
- [critic.sh](https://github.com/Checksum/critic.sh) - Dead simple testing framework for Bash with coverage reporting
- [esh](https://github.com/jirutka/esh) - A simple templating engine based on shell, implemented in ~290 lines of POSIX shell and awk.
- [Fishtape](https://github.com/jorgebucaran/fishtape) - TAP producer and test harness for fish
- [composure](https://github.com/erichs/composure) - Compose, document, version and organize your shell functions
- [dispatch](https://github.com/Mosai/workshop/blob/master/doc/dispatch.md) - A command line argument parser in 50 lines of portable shell script.
- [is.sh](https://github.com/qzb/is.sh) - An alternative for builtin test command, it will make your "if" statements pretty
- [lumberjack](https://github.com/molovo/lumberjack) - A logging interface for shell scripts
- [mo](https://github.com/tests-always-included/mo) - Mustache templates in pure bash
- [optparse](https://github.com/nk412/optparse) - A BASH wrapper for getopts, for simple command line arguments.
- [rerun](https://github.com/rerun/rerun) - A modular shell automation framework to organize your keeper scripts
- [revolver](https://github.com/molovo/revolver) - A reusable progress spinner for shell scripts
- [phases](https://github.com/sorokine/phases) - Minimally invasive bash preprocessor, select sections of your script to run
- [semver\_bash](https://github.com/cloudflare/semver_bash) - Semantic Versioning in Bash
- [sh-semver](https://github.com/qzb/sh-semver) - Semver tool for bash - finds versions matching to specified rules
- [shellcheck](https://github.com/koalaman/shellcheck) - Static analysis tool for shell scripts
- [shellfire](https://github.com/shellfire-dev/shellfire) - A repository of namespaced, composable shell (bash, sh and dash) function libraries
- [shpec](https://github.com/rylnd/shpec) - A shell testing framework
- [shutit](https://ianmiell.github.io/shutit/) - Automation framework based on bash and pexpect
- [sub](https://github.com/basecamp/sub) - A delicious way to organize programs
- [ts](https://github.com/thinkerbot/ts) - A shell test script
- [urchin](https://github.com/tlevine/urchin) - An idiomatic shell testing framework that uses only shell commands
- [shunit2](https://github.com/kward/shunit2) - A unit test framework for Bash scripts with a flavour of JUnit/PyUnit.
- [rebash](https://github.com/jandob/rebash) - Scripting library/framework. Features: imports, exceptions, doc-tests ...
- [zunit](https://github.com/zunit-zsh/zunit) - A powerful unit testing framework for ZSH
# [](https://github.com/alebcay/awesome-shell#guides)Guides
- [Bash Hackers Wiki](https://wiki.bash-hackers.org/)
- [Greg Wooledge's (aka "greycat") wiki](https://mywiki.wooledge.org/). Specifically [Bash Guide](https://mywiki.wooledge.org/BashGuide), [Bash FAQ](https://mywiki.wooledge.org/BashFAQ) and [Bash Pitfalls](https://mywiki.wooledge.org/BashPitfalls)
- [Google's Shell Style Guide](https://google.github.io/styleguide/shell.xml)
- [The Linux Documentation Project: Bash Programming - Intro/How-to](http://tldp.org/HOWTO/Bash-Prog-Intro-HOWTO.html#toc)
- [The Linux Documentation Project: Advanced Bash Scripting Guide](https://www.tldp.org/LDP/abs/html/)
- [WikiBooks: Bash Shell Scripting](https://en.wikibooks.org/wiki/Bash_Shell_Scripting)
- [Use the Unofficial Bash Strict Mode (Unless You Looove Debugging)](http://redsymbol.net/articles/unofficial-bash-strict-mode/)
- [The Art of Command Line](https://github.com/jlevy/the-art-of-command-line)
- [Learn Enough Command Line to Be Dangerous](https://www.learnenough.com/command-line-tutorial/basics)
- [A guide to learn bash](https://github.com/Idnan/bash-guide)
# [](https://github.com/alebcay/awesome-shell#other-awesome-lists)Other Awesome Lists
Other amazingly awesome lists can be found in [awesome-awesome](https://github.com/emijrp/awesome-awesome) and [awesome-awesomeness](https://github.com/bayandin/awesome-awesomeness).
### [](https://github.com/alebcay/awesome-shell#see-also)See also
- [awesome-cli-apps](https://github.com/agarrharr/awesome-cli-apps)
- [awesome-fish](https://github.com/jorgebucaran/awesome-fish)
- [awesome-zsh](https://github.com/unixorn/awesome-zsh-plugins)
- [terminals-are-sexy](https://github.com/k4m4/terminals-are-sexy)
# OSX
# Nouvelle page
# Ubuntu RDP server Xfce4
installation
# RDP XFCE4
après l'installation de Xubuntu,
installer openSsh,
`sudo apt install openssh-server`
Après avoir modifié le fichier /etc/ssh/sshd\_config, enregistrez-le et redémarrez le service sshd afin de prendre en compte les changements. Pour cela, saisissez la commande suivante dans un terminal :
```
sudo systemctl restart sshd.service
```
#### installation du serveur XRDP
```wp-block-preformatted
sudo apt-get install xrdp
```
```shell
echo xfce4-session >~/.xsession
```
```shell
sudo nano /etc/xrdp/startwm.sh
```
# Mise en veille de l'écran de l'imac sous linux
Modification de GRUB pour la mise en veille automatique :
```shell
sudo nano /etc/default/grub
```
si vous voulez que la commande soit exécutée automatiquement au démarrage, vous pouvez l'ajouter à la ligne de commande GRUB, pour ce faire, nous devons éditer le fichier suivant:
Une fois là-bas, ajoutez simplement `consoleblank=60` à `GRUB_CMDLINE_DEFAULT`, cela devrait ressembler à ceci:
```shell
GRUB_CMDLINE_LINUX_DEFAULT="quiet consoleblank=60"
```
Ensuite, fermez le fichier et enregistrez-le, après cela, lancez simplement `sudo update-grub` et le tour est joué, chaque fois que vous démarrez, l'écran s'éteint automatiquement toutes les 60 secondes. (encore une fois, si inactif).
```
sudo update-grub
```
Et de cette façon (l'ajout de consoleblank au GRUB) fonctionne même à partir de terminaux distants (ssh).
Voilà !
##### Bonus :
Si l'écran se rallume, voici petit alias pour allumer ou éteindre :
```shell
alias screenon="bash -c 'echo 255 > /sys/class/backlight/radeon_bl0/brightness;'"
alias screenoff="bash -c 'echo 0 > /sys/class/backlight/radeon_bl0/brightness;'"
```
# Apple File System APFS sur Linux
##### installation des dépendances :
```shell
sudo apt update
sudo apt install fuse libfuse-dev libicu-dev bzip2 libbz2-dev cmake clang git libattr1-dev libbz2-dev libfuse3-dev libz-dev
```
##### téléchargement des sources GIT :
```shell
git clone https://github.com/sgan81/apfs-fuse.git
cd apfs-fuse
git submodule init
git submodule update
```
##### Construction de fuse
```wp-block-code
mkdir build
cd build
cmake ..
make
```
Après la compilation, les binaires se trouvent dans le répertoire de construction. Je recommande de copier les outils apfs \* dans un répertoire accessible dans le chemin, par exemple / usr / local / bin. Pour les copier, faites simplement ceci :
```shell
sudo cp apfs-* /usr/local/bin
```
##### Montage de la partition APFS
Nous devons maintenant savoir sur quelle partition de disque se trouve macOS. En utilisant la commande fdisk -l, vous pourrez voir la disposition du disque.
```shell
sudo fdisk -l
--- 8>--snipped the loop volumes--<8 ---
Disk /dev/sda: 465.9 GiB, 500277790720 bytes, 977105060 sectors
Units: sectors of 1 * 512 = 512 bytes
Sector size (logical/physical): 512 bytes / 4096 bytes
I/O size (minimum/optimal): 4096 bytes / 4096 bytes
Disklabel type: gpt
Disk identifier: 6153AD88-FE14-4E88-8D9A-60E8AA465516
Device Start End Sectors Size Type
/dev/sda1 40 409639 409600 200M EFI System
/dev/sda2 409640 764593231 764183592 364.4G unknown
/dev/sda3 764594176 781570047 16975872 8.1G Microsoft basic data
/dev/sda4 781832192 976842751 195010560 93G Microsoft basic data
--- 8>--snipped the loop volumes--<8 ---
```
Vous pouvez voir dans mon exemple ci-dessus qu'il existe une partition inconnue de 364,4 Go. Je sais qu'il s'agit de ma partition macOS car je sais que la taille de ma partition macOS est de 365 Go. Cela signifie que l'identifiant de l'appareil est / dev / sda2, c'est donc ce que nous allons monter.
Vérifions-le et voyons si cela fonctionne….
```shell
sudo mkdir -p /media/$USERNAME/macos
sudo ./apfs-fuse -o allow_other /dev/sda2 /media/$USERNAME/macos
```
Si vous souhaitez que votre partition macos se monte automatiquement à chaque fois que vous démarrez votre ordinateur, vous devrez modifier la table de votre système de fichiers (fstab). Pour ce faire, nous devrons créer un lien symbolique vers l'outil de montage apfs, puis éditer le fstab (si vous n'avez pas nano, utilisez vim):
```shell
sudo ln -s /usr/local/bin/apfs-fuse /usr/sbin/mount.apfs
sudo nano /etc/fstab
```
Ajoutez une ligne au bas du fichier (le tout sur une seule ligne) qui dit ceci:``
```wp-block-code
mount.apfs#/dev/sda2 /media//macos/ fuse user,allow_other 0 0
```
Si vous voulez voir si cela fonctionne immédiatement, démontez simplement le disque (voir la section nettoyage ci-dessous). Tapez ensuite sudo mount -a pour monter le disque à partir du fstab.
##### Apprendre à connaître votre partition
Lorsque la partition est montée, vous verrez deux répertoires, private-dir et root. La racine du répertoire est celle que vous souhaitez. À l'intérieur se trouve le système de fichiers racine de votre mac. Vous trouverez vos informations dans le dossier "Utilisateurs".
##### Nettoyage (démontage)
Pour démonter correctement le répertoire macos, vous devez utiliser la commande fusermount:
# Authentification SSH par clés
Jusqu'à présent, nous avons pris pour habitude d’utiliser comme seul facteur d'authentification le mot de passe. **Il faut néanmoins savoir qu'il est également possible d'utiliser un autre facteur, une clé**. Cela est parfois préféré car la clé permet de ne pas avoir à retenir systématiquement des mots passe différents. Nous allons ici voir le fonctionnement général de cette méthode d'authentification.
**Il est courant sur des serveurs SSH de n’autoriser uniquement l’authentification par clé afin de sécuriser ce protocole**. La plupart du temps la génération de la clé se fait sous [Linux](https://www.it-connect.fr/cours-tutoriels/administration-systemes/linux/) sans trop de problème étant donné qu’*OpenSSH* y est nativement présent. Sous *Windows* toutefois, quelques manipulations sont à effectuer afin de générer et d’envoyer notre clé au serveur.
L'authentification par clés se fait donc via une paire de clés, **le client va donc générer une paire de clés, une publique et une privée**. Il va bien entendu garder sa clé privée pour lui et envoyer la clé publique au serveur SSH qui la stockera dans un endroit prévu cet effet.
Si vous souhaitez avec plus d'informations sur le [système](https://www.it-connect.fr/cours-tutoriels/administration-systemes/windows-server/systeme/) de clé privée/clé publique, je vous invite à lire ce [cours](https://www.it-connect.fr/cours-it-gratuits/) écrit par Florian Burnel :
\- Clés asymétriques :
## I. Génération de la clé
Étant donné qu'un client SSH peut être un client *Linux* ou un client *Windows*, nous allons voir comment générer cette paire de clés sous Linux en ligne de commande, et sous *Windows* via *PuttyGen*.
**Générer une paire de clés sous Linux**
Voyons tout d'abord comment générer une paire de clés sous Linux en ligne de commande. Pour cela, nous allons utiliser la commande "*ssh*-*keygen*" :
```
ssh-keygen
```
Si aucune option n'est spécifiée, une clé *RSA* de 2048 bits sera créée, ce qui est acceptable aujourd'hui en termes de sécurité. Si vous souhaitez spécifier une autre taille de clé, vous pouvez utiliser l'option "*-b*" :
```
ssh-keygen -b 4096
```
Par défaut, la clé va être stockée dans le répertoire .*ssh*/ de l'utilisateur courant (Exemple : /*root*/*.ssh* pour l'utilisateur *root*).
> **Note** : Pour une sécurité correcte de vos communications, il est aujourd'hui recommandé d'utiliser des clés de 4096 bits.
Il va ensuite nous être proposé de saisir une *passphrase*, **je vous recommande d'en mettre une** ! Concrètement, nous avons vu qu'une clé pourra être envoyé à plusieurs serveurs pour éviter d'avoir à saisir un mot de passe, en tant que possesseur de la clé privée correspondant à la clé publique envoyée au serveur SSH sur lequel on souhaite se connecter, le serveur nous acceptera directement.
Néanmoins, **si un tiers parvient à nous dérober notre clé privée, il arrivera à se connecter aux serveurs sans mot de passe**. Ainsi, une passphrase permet la protection de notre clé privée via un mot de passe, ou plutôt une phrase de passe ("*passphrase*"). L'avantage par rapport à un mot de passe SSH est que vous n'avez qu'un mot de passe à retenir, celui de votre clé privée et pas un mot de passe par serveur SSH.
Une fois créées, vous pourrez donc voir vos clés dans le répertoire ".*ssh*" de l'utilisateur :
```
root@itc-serveur-01:~# ls -al .ssh
total 20
drwx------ 2 root root 4096 juin 8 11:15 .
drwx------ 10 root root 4096 juin 8 11:11 ..
-rw------- 1 root root 3247 juin 8 11:18 id_rsa
-rw-r--r-- 1 root root 745 juin 8 11:18 id_rsa.pub
-rw-r--r-- 1 root root 444 avril 23 03:34 known_hosts
```
Pour rappel, nous nous situons toujours ici sur un Linux client, on remarque l'existence d'un autre fichier "*known\_hosts*", il s'agit ici d'un fichier permettant d'identifier un serveur. Si vous vous connectez en SSH à plusieurs serveurs depuis votre utilisateur ("*root*" dans mon cas), votre fichier *known\_host* va peu à peu se remplir. Cela entraîne entre autre le fait qu'une demande validation de la clé serveur est demandée à la première connexion du serveur mais pas lors des connexions suivantes.
## II. Mettre la clé sur le serveur
**Il nous faut maintenant faire l’opération consistant à envoyer notre clé publique sur le serveur afin de pouvoir s’y authentifier**, sous *Linux*, une commande est prévue à cet effet. (“*ssh-copy-id*” sous *Linux*). Il nous faut pour cela établir une connexion *SSH* sur le serveur par mot de passe (une dernière fois) avec la commande "*ssh-copy-id*" :
```
ssh-copy-id utilisateur@serveur
```
Par exemple si je souhaite, en tant que client, ajouter ma clé sur le serveur *SSH* *192.168.240.132* pour l'utilisateur *root* :
```
ssh-copy-id root@192.168.240.132
```
Notez que par défaut, cette commande va envoyer la clé publique "*.ssh/id\_rsa.pub*". On peut néanmoins, si l'on possède plusieurs paires de clés, spécifier la clé publique à envoyer au serveur, par exemple :
```
ssh-copy-id -i ~/.ssh/id_rsa_groupeServeurA.pub root@192.168.240.132
```
On devra donc saisir une dernière fois le mot de passe *SSH* de l'utilisateur visé sur le serveur *SSH*, puis nous aurons quelques messages de validation :
```
/usr/bin/ssh-copy-id: INFO: attempting to log in with the new key(s), to filter out any that are already installed
```
```
/usr/bin/ssh-copy-id: INFO: 1 key(s) remain to be installed -- if you are prompted now it is to install the new keys
```
```
Number of key(s) added: 1
```
Ici, on voit donc qu'une nouvelle clé a été ajoutée au serveur. Le message qui suit nous le valide :
```
Now try logging into the machine, with: "ssh 'root@192.168.240.132"
```
```
and check to make sure that only the key(s) you wanted were added.
```
En effet, maintenant que notre clé publique est présente sur le serveur que nous possédons dans notre répertoire .*ssh* sa clé privée associée, nous allons pouvoir nous connecter au serveur juste en saisissant la commande suivante :
```
ssh utilisateur@serveur
```
La passphrase de la clé publique nous sera demandée, puis on sera connecté en SSH à notre serveur.
L'avantage est le suivant : si cette même clé publique est envoyée à 30 [autres](https://www.it-connect.fr/cours-tutoriels/administration-systemes/autres/) serveurs, **la passphrase sera la même pour toutes les connexions alors qu'il faudra retenir 30 mots de passe différents** si vous utilisez la méthode d'authentification habituelle par mot de passe.
Dans le cas où vous êtes sous *Windows* ou alors que la méthode précédemment proposée n'est pas envisageable, on peut aussi faire cette manipulation manuellement. Il nous suffira alors simplement de copier le contenu de notre clé publique (par défaut "*.ssh/id\_rsa.pub*") dans le fichier "*.ssh/authorized\_keys*" de l'utilisateur du serveur visé.
Nous supposons ici que nous voulons une connexion sur le compte "*root*" (c’est bien sûr déconseillé dans un cadre réel). Nous allons donc aller dans le dossier "*home*" de cet utilisateur et créer le dossier ".*ssh*" s'il n’existe pas déjà :
```
mkdir .ssh
```
Le dossier ".*ssh*" est là où vont se situer les informations relatives aux comptes et aux connexions SSH de l’utilisateur. Nous y créerons le fichier "*authorized*\_*keys*" s’il n’existe pas. Ce fichier contient toutes les clés publiques que permettent d’établir des connexions avec le serveur et l’utilisateur dans lequel il se trouve (selon le dossier "*home*" dans lequel il se trouve). Nous allons ensuite dans ce fichier mettre notre clé publique (éviter de mettre les "*=== BEGIN==="* et "*===END==="* générés automatiquement par *PuttyGen*).
> **Note** : Sous *Windows*, il est possible de récupérer le contenu de la clé publique en l'ayant ouverte avec un simple bloc-notes pour le transférer dans le fichier "*authorized\_keys*".
Il nous faudra ensuite donner les droits les plus restreints à ce fichier par sécurité et pour les exigences d’OpenSSH :
```
chmod 700 ~/.ssh -Rf
```
Notre clé est maintenant présente sur le serveur, il nous reste plus qu’à nous connecter pour tester !
Pour les curieux, vous pourrez aller voir sur votre serveur SSH le contenu du fichier "*authorized*\_keys" qui se situe dans le répertoire .*ssh* de l'utilisateur destinataire. Oui, notez bien qu'une connexion SSH est une autorisation faite sur un utilisateur précis de la machine serveur. On peut avoir les identifiants pour se connecter à une machine Linux en tant qu'utilisateur "*mickael*" par exemple, mais pas en tant que root, ou inversement. Il s'agit en fait de l'accès à un compte sur une machine plutôt qu'à une machine, simple précision technique. 🙂
# Mount Epson Cifs
Mounter dans Fstab au boot la carte mémoire de l'imprimante
editer le fichier /etc/fstab
```shell
//printer/MEMORYCARD /media/printer_card cifs vers=1.0,username=guest,password=foo,sec=ntlm,uid=0
```
# Monter un disque local dans une LXC
```shell
pct set 103 -mp0 /mnt/NAS,mp=/mnt/NAS
```
installer docker dans LXC
editer le fichier de conf dans /etc/pve/lxc/
```shell
#insert docker part below
lxc.apparmor.profile: unconfined
lxc.cgroup.devices.allow: a
lxc.cap.drop:
```
# Configurer Synology sur un sous-domaine NGinx
Depuis quelques temps déjà j’ai décidé de configurer mon NAS Synology sur un sous-domaine. Là vous allez surement me dire que cela ne sert absolument à rien puisque QuickConnect offre cette fonctionnalité. Je vous répondrai donc que je préfère désactiver QuickConnect pour des raisons de sécurité, en effet si une vulnérabilité est découverte sur DSM il suffira à des petits malins de scanner tous les sous-domaines de quickconnet.to et d’essayer d’exploiter cette faille.
## Configurer Synology sur un sous-domaine NGinx
Dans cette exemple je partirai du principe que vous souhaitez accèder à votre NAS depuis l’url https://nas.mon-domaine.tld.
Si vous souhaitez vous connecter en http (ce que je vous déconseille) ajoutez le bloc suivant
```JSON
location / {
# check your DSM configuration to redirect to the right port
proxy_pass http://IP.LOCALE.DU.NAS:5000;
proxy_redirect http://IP.LOCALE.DU.NAS:5000 https://nas.noobunbox.net;
proxy_set_header Host $host;
proxy_set_header X-Real-IP $remote_addr;
proxy_set_header X-Forwarded-For $proxy_add_x_forwarded_for;
proxy_redirect off;
proxy_buffering off;}
```
Si vous souhaitez vous connecter en https (conseillé) ajoutez le bloc suivant
```JSON
location / {
# check your DSM configuration to redirect to the right port
proxy_pass https://IP.LOCALE.DU.NAS:5001;
proxy_redirect https://IP.LOCALE.DU.NAS:5001 https://nas.noobunbox.net;
proxy_set_header Host $host;
proxy_set_header X-Real-IP $remote_addr;
proxy_set_header X-Forwarded-For $proxy_add_x_forwarded_for;
proxy_redirect off;
proxy_buffering off;}
```
Testez votre configuration puis relancez NGinx
```shell
sudo nginx -t
sudo service nginx reload
```
Si vous n’avez pas d’erreur vous pouvez maintenant accéder à Synolgoy sur un sous-domaine via l’url http(s)://nas.votre-domaine.tld
# Nextcloud configuration domain
In addition to post above let me disclose requirements to the Nextcloud config.php file specified for reverse bypass. Following rows must be added into the file
```JSON
'trusted_domains' =>
array (
0 => '192.168.1.4:23456',
1 => 'allcash.asuscomm.com',
),
```
and following past in the bottom of file before );
```JSON
'trusted_proxies' =>
array (
0 => '192.168.1.32',
1 => 'localhost',
2 => 'allcash.asuscomm.com,
),
```
Also you can override route to direct all requests over DDNS and https:// adding these rows:
```JSON
'overwritehost' => 'allcash.asuscomm.com:443',
'overwriteprotocol' => 'https',
'overwritewebroot' => '/Nextcloud',
```
```JSON
'trusted_domains' =>
array (
0 => '192.168.1.85:444',
1 => 'home.server.com',
),
'overwrite.cli.url' => 'https://home.server.com',
'overwritehost' => 'home.server.com',
'overwriteprotocol' => 'https',
'overwritewebroot' => '/nextcloud',
```
##### Configuration du Reverse Proxy :
```JSON
location /nextcloud {
proxy_pass http://192.168.1.8;
proxy_redirect off;
proxy_set_header Host $host;
proxy_set_header X-Real-IP $remote_addr;
proxy_set_header X-Forwarded-For $proxy_add_x_forwarded_for;
}
```
##### Configuration Bonux :
I am running Nextcloud ver 19
This is what works for me in NPM:
- Turn on Websockets
- Force SSL
- HSTS Enabled
- HTTP/2
In Advanced
```JSON
location = /.well-known/carddav {
return 301 $scheme://$host:$server_port/remote.php/dav;
}
location = /.well-known/caldav {
return 301 $scheme://$host:$server_port/remote.php/dav;
}
```
# Proxmox Dark Theme
The installation is done via the CLI utility. Run the following commands on the PVE node serving the Web UI:
```shell
wget https://raw.githubusercontent.com/Weilbyte/PVEDiscordDark/master/PVEDiscordDark.sh
bash PVEDiscordDark.sh install
```
Source : [https://github.com/Weilbyte/PVEDiscordDark](https://github.com/Weilbyte/PVEDiscordDark "Github PVEDiscordDark")
# Tester votre bande passante avec Iperf
## Comment mesurer ma bande passante avec Iperf ?
Iperf est un outil pour mesurer la bande passante et la qualité d’un lien réseau. Ce dernier est délimité par deux machines sur lesquelles est installé Iperf.
## Présentation Iperf
La qualité d’un lien est déterminée principalement par les facteurs suivants :
– **Latence** (temps de réponse ou RTT): peut être mesurée à l’aide d’un Ping.
– La **variation de la latence (gigue)**: peut être mesurée par un test Iperf UDP.
– **Perte de paquet**: peut être mesurée avec un test Iperf UDP.
### Test débit bande passante avec Iperf
Quant à la **bande passante**, elle est **mesurée par des tests TCP**.
La bande passante se mesure entre deux points du réseau, un serveur d’un côté et un client de l’autre, la bande passante mesurée correspondra au lien le plus faible.
### Où télécharger Iperf ?
Télécharger iperf depuis le site officiel pour votre (ou vos) système d’exploitation : [https://iperf.fr/fr/iperf-download.php](https://iperf.fr/fr/iperf-download.php) (Privilégier la version 3)
### Quel est le port par défaut de Iperf ?
Par défaut, le client Iperf se connecte au serveur Iperf sur le port TCP 5001 (vérifier les ouvertures Firewall) et **la bande passante affichée par Iperf est celle du client au serveur** (donc upload depuis le client, pour tester le download il faut inverser les rôles des machines)
---
## Test débit TCP avec Iperf
Coté machine client, voici la commande a saisir :
```
iperf -c 10.1.1.1
------------------------------------------------------------
Client connecting to 10.1.1.1, TCP port 5001
TCP window size: 16384 Byte (default)
------------------------------------------------------------
[ 3] local 10.6.2.5 port 33453 connected with 10.1.1.1 port 5001
[ 3] 0.0-10.2 sec 1.26 MBytes 1.05 Mbits/sec
```
Et coté serveur :
```
------------------------------------------------------------
Server listening on TCP port 5001
TCP window size: 8.00 KByte (default)
------------------------------------------------------------
[852] local 10.1.1.1 port 5001 connected with 10.6.2.5 port 33453
[ ID] Interval Transfer Bandwidth
[852] 0.0-10.6 sec 1.26 MBytes 1.03 Mbits/sec
```
---
## Test débit UDP avec Iperf
Coté machine client, voici la commande a saisir sur la base suivante (iperf -c Adresse\_IP -u -b Bande\_Passante ) :
```
iperf -c 10.1.1.1 -u -b 10M
------------------------------------------------------------
Client connecting to 10.1.1.1, UDP port 5001
Sending 1470 byte datagrams
UDP buffer size: 108 KByte (default)
------------------------------------------------------------
[ 3] local 10.6.2.5 port 32781 connected with 10.1.1.1 port 5001
[ 3] 0.0-10.0 sec 11.8 MBytes 9.89 Mbits/sec
[ 3] Sent 8409 datagrams
[ 3] Server Report:
[ 3] 0.0-10.0 sec 11.8 MBytes 9.86 Mbits/sec 2.617 ms 9/ 8409 (0.11%)
```
Et coté serveur :
```
iperf -s -u -i 1
------------------------------------------------------------
Server listening on UDP port 5001
Receiving 1470 byte datagrams
UDP buffer size: 8.00 KByte (default)
------------------------------------------------------------
[904] local 10.1.1.1 port 5001 connected with 10.6.2.5 port 32781
[ ID] Interval Transfer Bandwidth Jitter Lost/Total Datagrams
[904] 0.0- 1.0 sec 1.17 MBytes 9.84 Mbits/sec 1.830 ms 0/ 837 (0%)
[904] 1.0- 2.0 sec 1.18 MBytes 9.94 Mbits/sec 1.846 ms 5/ 850 (0.59%)
[904] 2.0- 3.0 sec 1.19 MBytes 9.98 Mbits/sec 1.802 ms 2/ 851 (0.24%)
[904] 3.0- 4.0 sec 1.19 MBytes 10.0 Mbits/sec 1.830 ms 0/ 850 (0%)
[904] 4.0- 5.0 sec 1.19 MBytes 9.98 Mbits/sec 1.846 ms 1/ 850 (0.12%)
[904] 5.0- 6.0 sec 1.19 MBytes 10.0 Mbits/sec 1.806 ms 0/ 851 (0%)
[904] 6.0- 7.0 sec 1.06 MBytes 8.87 Mbits/sec 1.803 ms 1/ 755
```
# Proxmox redimentioner la partition pve-root
\# Check disk space before
`df -h`
\# Delete local-lvm storage in gui
```shell
lvremove /dev/pve/data
lvresize -l +100%FREE /dev/pve/root
resize2fs /dev/mapper/pve-root
```
\# Check disk space after
`df -f`
``
# Raspberry pi zero wifi boot
### Mise en place du wifi sans écran
Sur la carte mémoire dans la partition BOOT ajouter un fichier wpa\_supplicant.conf
```INI
country=fr
update_config=1
ctrl_interface=/var/run/wpa_supplicant
network={
scan_ssid=1
ssid="MyNetworkSSID"
psk="Pa55w0rd1234"
}
```
# Webcam Stream RTSP serveur
### Installation d'un serveur RTSP :
mise en place du docker pour le serveur RTSP
```shell
docker run --rm -it --network=host aler9/rtsp-simple-server
```
une fois le serveur lancé configurer avec ffmpeg l'encodage de la webcam vers le serveur RTSP
```shell
/usr/bin/ffmpeg -f v4l2 -i /dev/video0 -s 704x576 -input_format yuyv422 -r 25 -vcodec libx265 -f rtsp rtsp://192.168.1.69:8554/cam
```
Ajout de la webcam dans Home Assistant :
```YAML
- platform: ffmpeg
input: '-i rtsp://192.168.1.69:8554/cam'
extra_arguments: '-q:v 2 -r 25'
name: ImaCam
```
Ajout de la lovecard :
```YAML
- platform: ffmpeg
input: '-i rtsp://192.168.1.69:8554/cam'
extra_arguments: '-q:v 1 -r 25 -vf "scale=640:360"'
name: ImaCam
```
Script webcam.sh
```shell
docker run -d --name RTSP --network=host aler9/rtsp-simple-server
/usr/bin/ffmpeg -loglevel quiet -stats -f v4l2 -i /dev/video0 -s 704x576 -input_format yuyv422 -r 25 -vcodec libx264 -f rtsp rtsp://192.168.1.69:8554/cam &
```
# Organize tools
installation de organize tools :
`pip install organize-tool`
Configuration de Organize :
`organize config`
configuration du fichier confid.yaml
```YAML
rules:
# - folders: ~/Desktop
# filters:
# - extension:
# - jpeg
# - jpg
# actions:
# - move: '~/Desktop/images/'
# enabled: true
# subfolders: true
# # move incomplete downloads older > 30 days into the trash
# - folders:
# - ~/Downloads
# filters:
# - extension:
# - crdownload
# - part
# - download
# - lastmodified:
# days: 30
# actions:
# - trash
# - folders: ~/
# filters:
# - extension:
# - cbz
# - cbr
# actions:
# - macos_tags: BD (green)
# - move: '~/Downloads/bd/'
# enabled: true
# subfolders: true
# - folders: ~/Downloads
# filters:
# - extension:
# - mkv
# actions:
# - move: '~/Downloads/Film_A_Encoder/'
# - macos_tags: Encodage (blue)
# - shell : 'find ~/Downloads/. -type d -empty -print -delete'
# enabled: true
# subfolders: true
- folders:
- /Volumes/garfieldtux/Documents
- /Volumes/garfieldtux/Downloads
- /Volumes/garfieldtux/Desktop
filters:
- extension:
- pdf
actions:
- move: '~/Downloads/Pdf/'
- macos_tags: MacMini (red)
enabled: true
subfolders: true
- folders:
- /Volumes/garfieldtux/Documents
- /Volumes/garfieldtux/Downloads
- /Volumes/garfieldtux/Desktop
filters:
- extension:
- png
- jpeg
- jpg
actions:
- move: '~/Downloads/Images/'
- macos_tags: MacMini-Images (blue)
- shell :
- 'find /Volumes/garfieldtux/Documents/. -type d -empty -print -delete'
enabled: true
subfolders: true
```
# bash script a partir d'un fichier variable
```shell
filename='url.txt'
n=1
rm -rf downloadURL.txt
while read line;
do
# for read each line
echo "docker exec -i StreamRip tidal-dl -l $line" >> downloadURL.txt
n=$((n+1))
done < $filename
download='downloadURL.txt'
while read line;
do
n=$((n+1))
done < $download
bash downloadURL.txt
```
# Fstab sshd
mount ssh on device :
créer un dossier dans /mnt et donner les droits :
```
sudo mkdir /mnt/NAS
chmod -R 777 /mnt/NAS
```
```bash
sshfs garfieldtux@192.168.1.45:/ /mnt/NAS -o port=22,idmap=user,gid=1001,allow_other,reconnect,ServerAliveInterval=15,ServerAliveCountMax=3
```
# Samba Docker ipad
Création du docker-compose :
```yaml
version: '3'
services:
samba:
container_name: samba-2to3
hostname: samba
image: sixeyed/samba
volumes:
- /mnt/2to:/media/2to:z
ports:
- "139:139"
- "445:445"
- "137:137/udp"
- "138:138/udp"
command: samba.sh -p -s "2to;/media/2to;yes;no;yes;all"
mem_limit: 1g
restart: always
```
Lancement du docker avec la commande :
```bash
docker-compose up -d
```
connection au docker
```bash
docker exec -it samba-2to3 bash
```
installation de packages complémentaires :
```bash
apt update
apt install -y samba-vfs-modules nano
```
nano /etc/samba/smb.conf
```yaml
# Ipad OS
vfs objects = catia fruit streams_xattr
fruit:nfs_aces = no
ea support = yes
min protocol = SMB2
fruit:metadata = stream
fruit:model = MacSamba
fruit:veto_appledouble = no
fruit:posix_rename = yes
fruit:zero_file_id = yes
fruit:delete_empty_adfiles = yes
recycle:keeptree = yes
recycle:maxsize = 0
recycle:repository = .deleted
recycle:versions = yes
# Security
client ipc max protocol = SMB3
client ipc min protocol = SMB2_10
client max protocol = SMB3
client min protocol = SMB2_10
server max protocol = SMB3
server min protocol = SMB2_10
# Time Machine
fruit:delete_empty_adfiles = yes
fruit:time machine = yes
fruit:veto_appledouble = no
fruit:wipe_intentionally_left_blank_rfork = yes
```
Reboot du container ...
# Installer SSH keychain pour éviter d’avoir à saisir ses passphrases
#### Lorsqu’on a plusieurs clés SSH et que l’on souhaite éviter de saisir sans arrêt sa passphrase, [keychain](http://www.funtoo.org/Keychain) est la solution. Cet outil permet de gérer les clés SSH (et GPG mais ce n’est pas le sujet) de façon très pratique et sécurisée. Il agit en tant que frontal aux commandes `ssh-agent` et `ssh-add`. Contrairement à `ssh-agent` qui fonctionne sur une session (du login à la déconnexion), keychain conserve un agent fonctionnel tant que le serveur n’a pas été redémarré. Ceci diminue le nombre de fois où vous devrez saisir votre passphrase. De plus, il est facile d’utiliser l’agent dans un script exécuté par cron.
## [Installation](http://www.qanuq.com/2017/10/09/installer-ssh-keychain/#installation)
On utilise le gestionnaire de paquets sous Linux, et sous MacOS on utilisera [Homebrew](https://brew.sh/).
```
# sur un système Linux Debian
apt-get install keychain
# sur un MacOS
brew install keychain
```
Ensuite, on édite notre fichier `~/.bash_profile` pour y ajouter le contenu suivant.
```
eval `keychain --eval --agents ssh ~/.ssh/neptune_key ~/.ssh/ma_cle_perso`
```
On indique ici que l’on utilise la commande `eval` via l’option `--eval`, ceci permet de ne pas se soucier du SHELL que l’on exécute. On n’utilise que la partie SSH de l’agent `--agents ssh` et on indique les clés à déverrouiller en argument.
Si vous ne savez pas comment utiliser les clés SSH, vous pouvez aller faire un tour sur l’article [créer vos clés publique et privée SSH](http://www.qanuq.com/2017/10/09/creer-cles-publique-privee-ssh/).
## [Première ouverture du terminal](http://www.qanuq.com/2017/10/09/installer-ssh-keychain/#premiere-ouverture-du-terminal)
La première fois que j’ouvre mon terminal, keychain sait qu’aucune clé SSH n’est chargée, alors il demande les passphrases de chacune des clés. Si deux clés ont la même passphrase, à priori, keychain ne demande la passphrase qu’une seule fois, c’est mon cas dans cet exemple.
```
* keychain 2.8.3 ~ http://www.funtoo.org
* Starting ssh-agent...
* Adding 2 ssh key(s): /Users/matthieu/.ssh/neptune_key /Users/matthieu/.ssh/ma_cle_perso
Enter passphrase for /Users/matthieu/.ssh/neptune_key:
* ssh-add: Identities added: /Users/matthieu/.ssh/neptune_key /Users/matthieu/.ssh/ma_cle_perso
```
## [Sessions de terminal suivantes](http://www.qanuq.com/2017/10/09/installer-ssh-keychain/#sessions-de-terminal-suivantes)
Lorsque j’ouvre d’autres sessions de mon terminal, keychain indique que des clés sont chargées, il ne redemande donc pas les passphrases.
```
* keychain 2.8.3 ~ http://www.funtoo.org
* Found existing ssh-agent: 33235
* Known ssh key: /Users/matthieu/.ssh/neptune_key
* Known ssh key: /Users/matthieu/.ssh/ma_cle_perso
```
Dans le cas où l’agent est exécuté sur un serveur, la passphrase ne sera demandé qu’après un reboot.
## [Se connecter à un serveur SSH](http://www.qanuq.com/2017/10/09/installer-ssh-keychain/#se-connecter-a-un-serveur-ssh)
La connexion se fait de manière classique, on spécifie simplement la clé à utiliser. La passphrase ne doit pas être demandée si la clé privée correspondante est chargée en mémoire.
```
ssh -i ~/.ssh/neptune_key matthieu@monserveur.local
```
## [Lister les clés chargées](http://www.qanuq.com/2017/10/09/installer-ssh-keychain/#lister-les-cles-chargees)
Cette commande liste les signatures des clés chargées en mémoire.
```
keychain --list
SHA256:zz7Jx7tHoUpCdAAMSRXU7nl+zmbYdKeO9oYmQfsUg2s
SHA256:PYdgMViJ7OrcL8bVBV0aAsJkglFS7w9xDazNAMxWd84
```
## [Utiliser depuis un script via cron](http://www.qanuq.com/2017/10/09/installer-ssh-keychain/#utiliser-depuis-un-script-via-cron)
Si j’ai un script qui est exécuté par cron (le crontab de ma session), et que ce script doit se connecter à un serveur distant, pour faire une sauvegarde par exemple, voici comment utiliser keychain dans le script.
```
#!/bin/bash
# chemin vers la clé privée à utiliser
SSH_PRIVATE_KEY=~/.ssh/ma_cle_perso
# l'empreinte de la clé
SSH_KEY_FINGERPRINT=`ssh-keygen -E sha256 -lf "$SSH_PRIVATE_KEY" | cut -d\ -f2`
# chargement de keychain en mode silencieux
eval `keychain --quiet --agents ssh --noask --eval "$SSH_PRIVATE_KEY"`
# vérification que la clé privée est bien chargée dans keychain
if keychain --list | grep $SSH_KEY_FINGERPRINT > /dev/null; then
# on déroule notre script ici.
# exemple, on veut lister le répertoire distant de monserveur.local
LS=`ssh -i "$SSH_PRIVATE_KEY" matthieu@monserveur.local ls`
else
printf "Erreur, clé %s non chargée...\n" "$SSH_PRIVATE_KEY" >&2
# envoyer un email pour prévenir l'utilisateur, par exemple
fi
```
L’option `--noask` indique à keychain qu’il ne doit pas demander la passphrase, étant donné qu’il s’agit d’un script exécuté sans intervention humaine, personne ne sera là pour la saisir si la clé privée est verouillée. On teste ensuite que notre clé est bien chargée en mémoire, pour cela on calcule son empreinte, puis on vérifie si elle est dans la liste des clés chargées.
## [Décharger les clés en mémoire](http://www.qanuq.com/2017/10/09/installer-ssh-keychain/#decharger-les-cles-en-memoire)
Si on doit laisser quelqu’un utiliser son ordinateur quelques minutes, on ne veut pas que cette personne puisse se connecter à un de nos serveurs. On doit donc décharger les clés en mémoire.
```
keychain --clear
* keychain 2.8.3 ~ http://www.funtoo.org
* Found existing ssh-agent: 33235
* ssh-agent: All identities removed.
```
Sur un serveur distant, afin d’améliorer la sécurité de keychain, on peut utiliser cette option dans le `.bash_profile`. Ainsi, on prend pour hypothèse que chaque nouvelle session SSH est considérée comme étant initiée par un intrus, l’intrus doit donc prouver qu’il est un utilisateur légitime en saisissant la passphrase, même si la clé était déjà en mémoire auparavant. Les scripts lancés par cron pourront toujours s’exécuter lorsque vous vous déconnecterez, sauf si un intrus s’est réellement connecté, et dans ce cas, la passphrase n’aura pas été saisie.
Sur un serveur, il est courant de mettre cette ligne dans le fichier `~/.bash_profile`.
```
eval `keychain --eval --clear --agents ssh ~/.ssh/neptune_key ~/.ssh/ma_cle_perso`
```
## [Un point sur la sécurité](http://www.qanuq.com/2017/10/09/installer-ssh-keychain/#un-point-sur-la-securite)
Utiliser un agent SSH a une incidence sur la sécurité, voici ce qu’il faut savoir.
- Ne copiez pas votre clé privée sur un serveur non administré par vous, si vous le faites, vous partagez votre clé avec l’administrateur, la passphrase protège normalement votre clé, mais si vous avez copié votre clé privée, c’est que vous l’avez sans doute utilisée, vous avez donc partagé votre passphrase avec l’administrateur, même si cette opération n’est pas simple à réaliser, on peut se demander si la clé privée est compromise, à partir de cet instant. Ne stockez vos clés privées que sur des machines dites de confiance, encore mieux, ne lancez vos sessions SSH que depuis votre ordinateur personnel.
- N’utilisez l’agent SSH ou l’agent forwarding que sur des machines administrées par vous car ces deux méthodes créent des variables d’environnement `SSH_AUTH_SOCK` contenant une socket vers l’agent SSH, il suffit à l’administrateur de mettre le chemin vers cette socket dans la variable d’environnement `SSH_AUTH_SOCK` de sa propre session pour avoir accès à toutes vos machines, sans mot de passe.
Concernant ce dernier point, on pourra ajouter ceci dans notre fichier `~/.ssh/config` pour interdire l’agent forwarding.